Pages

Friday 7 December 2012

WORDLE / WORDSIFT


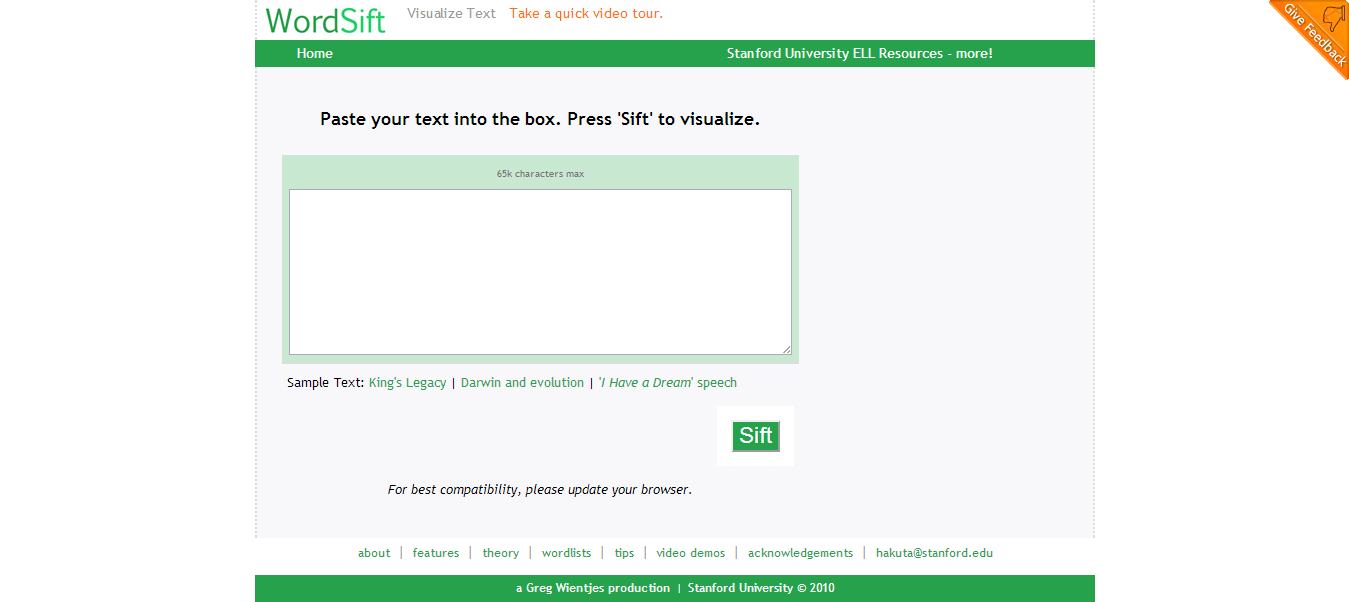
Wordle or Wordsift is a tool used to create word clouds - a visual representation of texts whereby the most frequent occurred word shows up the largest. The word clouds can be made up from one's own text or just by inserting the url of a website. The differences between Wordle and Wordsift are that one can choose from a variety of layout from Wordle, but not from Wordsift, and the presence of Thesaurus application and examples for the use of words in Wordsift.  Both the tools have its own advantages which depending on the needs of an individual. 


INTEGRATION OF WORD CLOUDS IN AN ESL CLASSROOM

Example 1: Predicting & Previewing  (Pre-reading Activity)

  1. Teacher could use Wordle or Wordsift to create a word cloud for students to predict and preview the content of a reading text. 
  2. Each of them will be given the word cloud created to guess the themes and topic of the reading text. Then teacher will hold a class discussion and activate students' schemata on the topic of the reading text.
  3. After that, students will be given the text to skim and scan through it. Then they will have to complete the authentic tasks and discuss the answers with their partners. 
  4. A second reading of the text will then be carried out. In this stage, some reading skills will be practiced unconsciously in order to get a good comprehension of the text. Then, the teacher could emphasized on the reading skills that have been practiced by the students while reading. 
  5. Lastly, students will be given some comprehension questions to be completed in groups. 

Example 2: Scrambled Sentences (While-listening Activity)

  1. An audio recording will be played in class. Students should listen to the content carefully without making any notes.
  2. After having a rough idea on the content of the recording, students will be divided into groups of 4 to complete a while-listening activity.
  3. This will be a sentence re-arrangement exercise which could be created with Wordle or Wordsift. The teacher could jumble-up a few sentences taken from the content of the listening text for students to be completed during the while-listening stage. This scaffolding process would then help students to have a better understanding on the listening text.
  4. The teacher could then discuss the answer with the students and have a feedback session on the activity.  

P/S: This activity should be practiced on the upper-intermediate or advanced level of students. 


ADVANTAGES

  • The presentation of vocabulary is interesting as there are a variety of layout to choose from Wordle. 
  • It can be printed and saved in public gallery for others to view (Wordle).
  • It works in many languages (Wordle).
  • It can be embedded into a blog (Wordle).
  • It takes examples of the word from other sources (Wordsift).
  • It provides images that are related to the words (Wordsift).
  • It can create a new work place and pull down the selected word (Wordsift).

LIMITATIONS

  • It requires for the Java download application (Wordle).
  • A very limited word cloud designs to choose from (Wordsift).
  • It demands for an internet connection (Both).
Interesting?? Try them out then!!!

Thursday 6 December 2012

EDMODO


Edmodo is a free virtual learning environment. It does not require any email to sign up, thus makes the introduction of this tool a lot quicker and easier. The interface is quite similar to Facebook, and could also be treated as a social network. This tool is good for collaboration work, which means the teacher and all the students should be encouraged to participate in it. In order to restrict people from participating in a group discussion, the teacher could actually create a private group which only allows access to students who have the group code. In addition, the teacher could also upload videos, create files, add links, create quizzes as well as create polls with this tool. Hence, it is a highly recommended virtual learning environment. 


WORKING WITH EDMODO IN AN ESL CLASSROOM

Example 1: Create A Quiz (Post-reading Activity)

  1. Teacher could first activate students schemata on the topic related to the reading text.
  2. Then, the teacher could hand out the reading text for the students to skim and scan through the text.
  3. After that, they could discuss on the authentic tasks and students will have to read the text by applying some of the reading skills.
  4. This will then be followed by a group work - write a summary of the reading text.
  5. Lastly, students will have to complete a quiz based on the text on which has been created by the teacher in Edmodo. They would also get a score for the quiz done. This can only be carried out with a condition that all of the students in the class must have registered for an Edmodo account beforehand.

Example 2: Create an Assignment (Writing Activity)

  1. Teacher could either choose to carry out this writing activity  fully with Edmodo or integrate it with some classroom discussion. However, the example here mainly focus on the activity done with Edmodo only.
  2. After setting up a group with the full participation of the students, the teacher could come out with a few questions which are related to the topic for the writing task to encourage comments and feedback from the students. The questions can be posted on the wall of the group. From here, students could have a written discussion instead of an oral ones.
  3. After some interaction that has been done between the students and the teacher, the teacher could actually create an assignment for the group (related to the topic that has been discussed).
  4. The date of submission can be set and students will be able to submit their assignment through Edmodo itself.  

Advantages:

  • It is FREE.
  • It provides teacher and students a secure place to connect, collaborate and share content.
  • It decreases the hassle of travelling and meeting when classes are being carried out in a virtual environment.
  • It is quite user-friendly as one does not need to have an email to sign up.
  • It has iOS and Andriod apps available through the Apple apps store and Google Play. Thus, one could actually access to it even without a laptop or computer. 

Limitations:

  • It demands for internet connection.
  • A teacher cannot recover the information lost about a student.
  • You cannot delete the account that has been set up yourself. Instead, you need to contact the administrator. 
Let's start to have fun with it!!!

Wednesday 5 December 2012

BE CREATIVE WITH ZIMMER TWINS!!!


Zimmertwins.com is an innovated online tool for creating movies using the characters from the show "Zimmer Twins". Edgar and Eva - the 12 years old twins with psychic power and their cat - I3 are the characters that children can used to create an animated movie with this tool. One can either choose to create an ending to one of the story starters or create their own stories from scratch. Additionally, one could also watch a movie from those that have been shared in zimmertwins.com. Children could choose the characters, emotions, actions, themes as well as add in dialogues in creating the animations. The undo and redo actions are available while creating the movie, which could ease children in editing the movies to their satisfaction. A brief explanation on "How to Make a Movie" with zimmertwins.com can be seen from here http://www.zimmertwins.com/movie/howto.


                                                                                (adapted from iLearn Technology)

How to Integrate Zimmertwins.com in an ELT Classroom??

Example 1 (Post-Writing Activity):

  1. Teacher gives the students a context or provide them with a few sentences of the starting point of a story.
  2. Then, a discussion can be held in the class to activate the students' schemata about  themes that could be related to the story. Teacher should also ensure that the students are aware of  the group of audience for their writings. 
  3. Students should be informed that the stories created will be made into a movie. This is to motivate them in creating a more interesting story as well as triggering their creativity skills.   
  4. After that, students will be taught to use this tool and each of them will have to create a movie based on the content of their writings. 
  5. Finally, students can share their movies with their friends by showing them in class. Then, a writing activity could be more acceptable especially in an ESL classroom. 
P/S: This would be a scaffolding activity for the students as they are being taught and guided in steps. 

Example 2 (Presentation stage in P-P-P):

  1. Teacher will introduce the topic of "Language Functions" to the students. Before informing the students on what will be taught today, teacher could first show a movie created with Zimmertwins.com to the students.
  2. Teacher could ask the students to guess the topic that will be taught from the content of the movie. 
  3. After that, teacher could present the knowledge of language functions to the students. They will be divided into groups to complete a few exercises on "Language Functions".
  4. Then, answers will be discussed and feedback will be provided.
  5. Lastly, students will be assigned a task - create a movie using zimmertwins.com and send it to the teacher. Teacher could randomly choose the movies created by the students and use them on the following lesson to activate students schemata on the "Language Functions" that have been learnt.

Advantages:

  • It could trigger students' creativity skills.
  • Its background sound effect and animation would attract students' attention.
  • Visual learning could take place. It could focus on students' multiple intelligence. 
  • It prepares students to the outside world as they could visualize how the authentic conversation takes place.
  • It's a FREE tool.
  • Students could relate it to their lives because the animation are made up of their daily activities.

Limitations:

  • Actions are quite limited to be chose from. 
  • Internet connection is necessary.
  • There are only 3 characters for the movie - boring.
  • The movie cannot be embedded into a blog page. 
Now, let's have a go!!!

Tuesday 20 November 2012

VOCAROOOOOOOO


Vocaroo is a service for sending voice messages across the interwebs. In other words, it is also called as a podcast. Well, what is podcasting? 
Podcasting is a process of audio recording which need a connection to the internet and can be done on a regular basis. Then, one can actually send the podcast to itunes or embed it into a blog. From there, others could download the podcast and save it into their electronic gadgets. It is a very portable tool and is highly recommended to use as a teaching aid in the language classroom. 

Vocaroo in An ELT Classroom?? HOW??

Example 1: Oral Test

Teacher could use Vocaroo in carrying out an English oral test. Instead of carrying out the test in the classroom. teacher could consider to do it with podcasting so that time will not be wasted in the classroom. 
  1. Each student will be asked to make an audio recording on any of their favourite topics for 2 - 3 minutes long. 
  2. Then, they will have to email the podcast to their teacher.
  3. Teacher will listen to the podcast at home and think of 3 questions to be asked to the students in class on the following days.
  4. Teacher will then call each student out and ask them 3 questions based on the podcast sent to the teacher.
  5. Finally, teacher will access the students' oral skills based on the podcast as well as the answers given.

Example 2: Speaking Task

Vocaroo can be used as a speaking task for students to practice their communicative skills.
  1. Teacher first record a podcast of a story and play it in class. This will be used as an example so that students could understand better how the activity is being carried out.
  2. After that, students will be divided into groups of four. Each group will be assigned a different task - prepare a story, an interview, a report, etc. It is compulsory for every student to speak for at least two minutes.  
  3. Students will then carry out a group discussion and prepare their own part of speech. At this point, teacher will walk around the class and try to listen to the students' discussion. Notes will be taken too.
  4. This will be followed by a feedback session. Teacher could provide some feedback on the organization of script, pace of speech or the words pronunciation of the students.
  5. Lastly, some modification could be made and the students will have to record the task assigned into a podcast by using Vocaroo. All the podcast could then be embedded onto the class blog and students could comment on each other's works. 

Advantages:    

  • It is a FREE tool.
  • It is very portable. One can download the podcast and save it on their gadgets. Then, they can listen to it at anywhere on anytime.
  • By integrating podcasting in an ELT class, different types of interaction can be created in class - Teacher-Student Interaction, Student-Student Interaction, etc.
  • Students will be motivated to speak the target language as they can record it at their own comfort zone.
  • Could listen to one's recording and re-record until one is satisfied with his/her speech.  
  • There is no time limit for the audio recording.
  • Used as a mean to check on students' pronunciation.

Limitations:

  • It demands for internet connection and a microphone.
  • It might decrease students' use of target language (TL) in the public. Students might prefer to record their use of TL instead of speaking it in public.

Record music and voice >>
Curious?? Try it out!!!
http://vocaroo.com/

Wednesday 31 October 2012

INTERVUE OR INTERVIEW??


It's INTERVUE. Intervue is an amazing, quick and easy tool for anyone looking to gather their video responses towards a question. One could first create a topic or theme with few questions attached to it. Then, others will be able to choose either of the questions and response to it by recording a video of their answers with the use of a webcam. However, the answer must be kept concise as the recording cannot be more than 60 seconds. Once the video reply has been posted, others can also comment on it and remark how accurate is the answer.

How to Integrate Intervue in an ELT Class???

Example 1: Essay Writing

  1. Teacher can first ask the students to sign up an account in http://intervue.me/.
  2. Then, teacher will create a new Intervue page by stating the topic of the essay and attach three questions which are related to the content of the writing.
  3. Students will then be given the link of the Intervue page. They would have to answer all the questions by recording a 1 minute video of their responses each to the questions. This is a way to brainstorm their ideas towards the content of the writing task.  
  4. Students could also watch each other's video responses and comment on them. All these responses will mostly be the main points of their essay writing. 
  5. Finally, the students could produce a piece of essay based on the ideas taken from the video recordings.     
P/S: This will be done in the pre-writing stage in order to activate students' schemata on the related topic. 

Example 2: Oral test

  1. An English teacher could use Intervue to assess students' English speaking proficiency. 
  2. Instead of doing the traditional way of oral test in class, why not try something different this time? The teacher could create a new Intervue page by posting a topic and a few questions to aid the students in speaking.  
  3. Each and every students will have to log on to the page and record a video of their responses based on the topic stated.
  4. Then, the teacher could assess his/her students' oral skills based on their level of fluency and accuracy in speaking.

Advantages:

  • Students will be motivated to talk.
  • It can be treated as an oral exercise. Teacher will have a record of it (e-portfolios).
  • It involves real communication (authenticity).
  • Students could do the recordings based on their own comfort zone (lower affective filter). 
  • It is absolutely FREE.
  • A sense of ownership can be created (personalisation).
  • Boost students' confidence to speak. 

Limitations:

  • If recordings are done at home, it may the destroy the spontaneity as the aim of perfection is greater. 
  • It demands for internet connection, a microphone and a webcam.
  • It only allows a maximum of 1 minute of recording.
  • If the page is open to public, it may be likely to receive some inappropriate recordings. 
Come on, let's try it out!!

Tuesday 23 October 2012

SING & LEARN @ LYRICS TRAINING


Lyrics Training is a web application which one can read and listen to lyrics from music videos. It can be selected from a range of languages such as English, French, Dutch, Spanish, et cetera. Furthermore, one can select the game mode and starts to play the game. For the beginner and intermediate stage, the game requires learners to fill in the missing words from the lyrics, whereas for the expert level, one needs to type out the complete lyrics of a song. There is a timer at the bottom of the video for students to monitor their progress in the game. The music can also be replayed if students need to hear it for once again.  


INTEGRATION OF LYRICS TRAINING IN AN ESL CLASSROOM 

Example 1 (Listening Activity):

  1. Firstly, teacher could play a song, which has been chosen from the lyrics training website, to the class. At this stage, only the song will be played, not the video.
  2. Students will have to listen carefully and understand the lyrics of the song. The song will be played for a second time. 
  3. Then, students will be divided into groups of three to complete a task. They will have to fill in the missing words of the song lyrics which could be extracted from the beginner level game in the lyrics training website or which has been prepared by the teacher. 
  4. The teacher could replay the song if the students are having difficulty to complete it. After that, the teacher could show the music video to the students for them to check their answers. From here, the grammar and vocabulary that have been tested could be re-emphasized. 
  5. Lastly, teacher could move on to the intermediate level or the expert level of the game. This could be carried out as a whole class activity.  

Example 2 (Self-Learning Activity):

  1. Teacher could introduce this tool for students to learn and build up their language at home. 
  2. The students should first be encouraged to create an account in the Lyrics Training website so that they could keep a record on the scores gotten from the activities. 
  3. From here, students could improve their pronunciation and spelling of English language or any other languages. Students could also refer to the dictionary if they found any new vocabulary from the song lyrics.

Advantages:

  • It is an interesting and engaging way of acquiring  a language as the students could choose their favourite song to play with it.
  • It is a FREE tool.
  • Students are exposed to the authentic use of a language.
  • It creates a fun and relaxing atmosphere in learning a language and thus lower the students' affective filter.  
  • This tool could cater to students who acquire a knowledge better through music (musical intelligence).  

Limitations:

  • Teacher cannot copy the lyrics easily to be used in class. Instead, teacher could refer to it and type in out.
  • There is no referencing for the vocabulary or story line of the songs. Students need to search it themselves.
  • It demands for internet connection, thus is a downside for people who do not have internet access. 
  • Some of the music videos which taken from Youtube might disappear if the video has been removed from Youtube. 
  • The selection of songs are quite limited.
Let's give it a go!!!


Thursday 18 October 2012

FUN WITH BUBBLR

Bubblr is a project done by Pimpampum.net. It is a tool used to create comic strips using photos from Flickr. One could either use the public images found in Flickr or images from one's own account in Flickr. Speech bubbles can also be added to the images to create dialogues or thoughts. Bubblr can be used for presentation as well as a teaching tool in class.
Let's try it out!!! http://www.pimpampum.net/bubblr/

  1. Firstly, type in the tag and hit GO.
  2. Then, wait for the images to load. Choose the one that you like and drag it to the main window.
  3. You can also add on the speech or thought bubbles from the bottom of the page.
  4. Lastly, hit the PUBLISH button!!! You can then put a tittle for the strip and press DONE. It will be then saved automatically. If you would like to have a copy of the strip, you can send it to your email using the "send to" feature at the bottom of the page.


Here is an example of a completed comic strip created using Bubblr with the theme of "Malaysia 2012".


How to Integrate Bubblr in ELT Classroom?

In order to make your ELT classes more interesting, you can start the lesson with Bubblr. Bubblr can be used as a brainstorming activity for an essay writing task. For instance, the essay topic given to the students is "Festival". During the pre-writing stage, a teacher could use the comic strip that has been prepared earlier using Bubblr to brainstorm the students. The comic strip could be made up of images of various festivals that are celebrated around the world. This could allow the students to visualise the scenes and subsequently activate their schemata. Students would also be more attentive in class since technology has been used instead of the traditional method of teaching. 

Another way of integrating Bubblr in an ELT classroom is to allow the students to use it. How? Firstly, teacher could introduce Bubblr to the students. Then, divide the students into groups of four and allow them to familiarize themselves with the tool by creating a comic strip. After some time, students should be encouraged to present their individual work with Bubblr. The teacher could  then monitor the students' use of language from the dialogue and thoughts created on the strip. Moreover, the sense of ownership created from their production will also allow the students to be proud of their own work and thus have more interest in learning a language.   

Advantages:

  • It is engaging as it includes real life pictures.
  • Students will be able to visualise the scenes.
  • A sense of ownership can be created.
  • It is absolutely FREE.
  • We do not break copyright.
  • It develops students' creativity in learning. 
  • It is user-friendly. One does not have to set-up an account to use it.

Limitations:

  •  Sometimes the captions or descriptions of the presentation sent to our email do not fully appeared as how it has been prepared.
  • The words in the dialogue box cannot be seen clearly once it has been embedded into a blog.    
  • It is a one-way-interaction-task. No one can comment on the  presentation. 
  • Finding a right picture may take a long time when the tag does  not match the keywords of the images posted in Flickr.
  • The width of the dialogue box cannot be adjusted. 
  • Some pictures with very big size are difficult to be deleted once it has been dragged onto the strip.